With Facebook having a billion users and counting, it’s likely that plenty of your friends and family members already have a Facebook profile. It’s free and easy to join them, and only takes a few moments.
Like most social networking sites, Facebook asks each potential user to create a user profile before they can join. This can contain as little or as much information as you want, although there are some mandatory details.
Once you’ve created your profile, you can also adjust the privacy settings to specify which details you want to be made public
You’ll need:
- a computer with an internet connection
- an email account set up and ready to send and receive emails.
Follow these step-by-step instructions to join Facebook
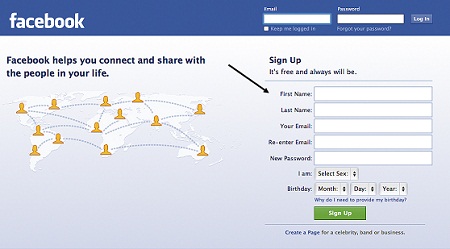
Step 1: Go to the Facebook website. Under ‘Sign Up’, you will see several boxes that require information such as your name and email address.
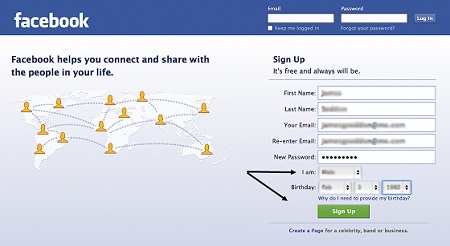
Step 2: Both the gender and date of birth boxes have information in drop-down lists. Click an arrow to display a list where you can click on the data that matches your personal details.
When you’ve filled in all your details and entered your password, click the green Sign Up button.
Step 3: A new window will open, showing some writing (usually nonsense) and an empty box. This is known as a CAPTCHA and is designed to ensure that a human is creating the account, rather than a machine set up for the purposes of spamming or similar.
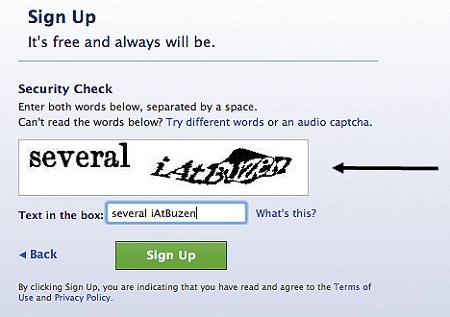
In the box, enter the letters as you see them and then click Sign Upagain.
Step 4: Facebook will now open your profile and ask you a series of questions to help you get started. ‘Step 1′ is designed to help you link up with friends who are already using Facebook.
To do this, insert the email address that you used to create your profile (if it’s a webmail address such as Gmail) in the box provided and then click Find friends. Facebook will access your email contacts, match them up with existing Facebook users and make the latter your ‘friends’.
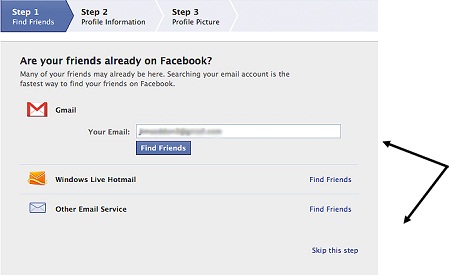
If you don’t want to do this now or would prefer to do it manually, click Skip this step.
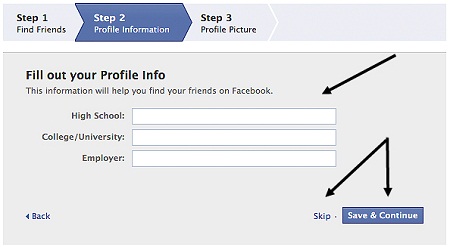
Step 5: The next step – ‘Step 2′ – is intended to help you build your profile. Remember, people may be searching for Facebook users not just by name but also by school, university or employer. If you’ve decided to use Facebook to renew acquaintances, this information could prove invaluable in helping people find you.
If you do want to provide this information, complete the boxes and click Save & continue. However, if you decide that you’d rather not do this now, click Skip.
Step 6: The third step will ask you to add a ‘profile picture’. You can either click Upload a Photo to install an existing photograph that you’ve saved on your computer or one that can be accessed from it or – if you have a webcam that takes still images – you could click Take a Photo.
Many people choose to use a picture of something other than themselves for their profile – for instance, a cartoon character or a photo of their children or a favourite pet. If you’d rather have nothing, click Skip. If you add a photo, remember to click Save & Continue when you have finished.
Step 7: This is the last step before you’re ready to start your Facebook adventure!
Your brand new Facebook profile page will open with a bar at the top. Click the Go to your email button.
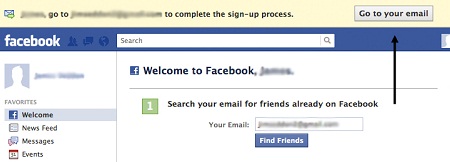
This will open your email inbox where you’ll find an email from Facebook containing a hyperlink. Click on this to verify that you’re the person who created the new profile.
You’ll then be logged into Facebook, ready to experience all that it has to offer.
No comments:
Post a Comment